Write automated tests
Before you begin
This codelab teaches you about automated tests in Android, and how they let you write scalable and robust apps. You also become more familiar with the difference between UI logic and business logic, and how to test both. Finally, you learn how to write and run automated tests in Android Studio.
Prerequisites
Ability to write an Android app with functions and composables.
What you’ll learn
What automated tests in Android do.
Why automated tests are important.
What a local test is and what it’s used for.
What an instrumentation test is and what it’s used for.
How to write local tests for Android code.
How to write instrumentation tests for Android apps.
How to run automated tests.
What you’ll build
A local test
An instrumentation test
What you’ll need
The latest version of Android Studio
The solution code for the Tip Time app
Starter code
Branch: main
Clone:
$ git clone https://github.com/google-developer-training/basic-android-kotlin-compose-training-tip-calculator.git
$ cd basic-android-kotlin-compose-training-tip-calculator
$ git checkout main
Automated tests
Testing, for software, is a structured method of checking your software to make sure that it works as expected. Automated testing is code that checks to ensure that another piece of code that you wrote works correctly.
Testing is an important part of the app development process. By running tests against your app consistently, you can verify your app’s correctness, functional behavior, and usability before you release it publicly.
Testing also provides a way to continuously check the existing code as changes are introduced.
While manual testing almost always has a place, testing in Android can often be automated. Throughout the remaining course, you focus on automated tests to test the app code and the functional requirements of the app itself. In this codelab, you learn the very basics of testing in Android. In later codelabs, you learn more advanced practices of testing Android apps.
As you become familiar with Android development and testing Android apps, you should make it a regular practice to write tests alongside your app code. Creating a test every time you create a new feature in your app reduces your workload later as your app grows. It also provides a convenient way for you to make sure your app works properly without spending too much time manually testing your app.
Automated testing is an essential part of all software development and Android development is no exception. As such, there’s no better time to introduce it than right now!
Why automated tests are important
At first, it might seem like you don’t really need tests in your app, but testing is needed in apps of all sizes and complexities.
To grow your codebase, you need to test existing functionality as you add new pieces, which is only possible if you have existing tests. As your app grows, manual testing takes much more effort than automated testing. Furthermore, once you start working on apps in production, testing becomes critical when you have a large user base. For example, you must account for many different types of devices running many different versions of Android.
Eventually, you reach a point where automated tests can account for the majority of usage scenarios significantly faster than manual tests. When you run tests before you release new code, you can make changes to the existing code so that you avoid the release of an app with unexpected behaviors.
Remember that automated tests are tests executed through software, as opposed to manual tests, which are carried out by a person who directly interacts with a device. Automated testing and manual testing play a critical role in ensuring that users of your product have a pleasant experience. However, automated tests can be more precise and they optimize your team’s productivity because a person isn’t required to run them and they can be executed much faster than a manual test.
Types of automated tests
Local tests
Local tests are a type of automated test that directly test a small piece of code to ensure that it functions properly. With local tests, you can test functions, classes, and properties. Local tests are executed on your workstation, which means they run in a development environment without the need for a device or emulator. This is a fancy way to say that local tests run on your computer. They also have very low overhead for computer resources, so they can run fast even with limited resources. Android Studio comes ready to run local tests automatically.
Instrumentation tests
For Android development, an instrumentation test is a UI test. Instrumentation tests let you test parts of an app that depend on the Android API, and its platform APIs and services.
Unlike local tests, UI tests launch an app or part of an app, simulate user interactions, and check whether the app reacted appropriately. Throughout this course, UI tests are run on a physical device or emulator.
When you run an instrumentation test on Android, the test code is actually built into its own Android Application Package (APK) like a regular Android app. An APK is a compressed file that contains all the code and necessary files to run the app on a device or emulator. The test APK is installed on the device or emulator along with the regular app APK. The test APK then runs its tests against the app APK.
Write a local test
Prepare the app code
Local tests directly test methods from the app code, so the methods to be tested must be available to the testing classes and methods. The local test in the following code snippet ensures that the
calculateTip()method works correctly, but thecalculateTip()method is currentlyprivateand thus not accessible from the test. InMainActivity.kt, remove theprivatedesignation and make itinternal:internal fun calculateTip(amount: Double, tipPercent: Double = 15.0, roundUp: Boolean): String { var tip = tipPercent / 100 * amount if (roundUp) { tip = kotlin.math.ceil(tip) } return NumberFormat.getCurrencyInstance().format(tip) }
On the line before the
calculateTip()method, add the@VisibleForTestingannotation:@VisibleForTesting internal fun calculateTip(amount: Double, tipPercent: Double = 15.0, roundUp: Boolean): String { var tip = tipPercent / 100 * amount if (roundUp) { tip = kotlin.math.ceil(tip) } return NumberFormat.getCurrencyInstance().format(tip) }
This makes the method public, but indicates to others that it’s only public for testing purposes.
Create the test directory
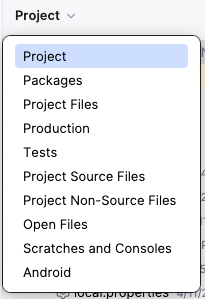
In Android projects, the
testdirectory is where local tests are written.In the Project tab, change the view to Project.
Right click on the
srcdirectory.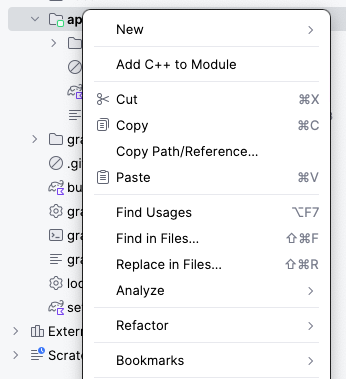
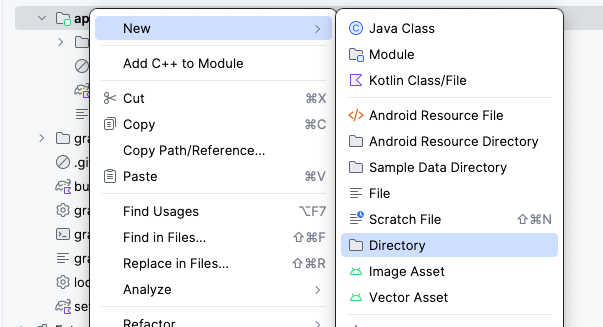
Select New ➜ Directory
In the New Directory window, select
test/java.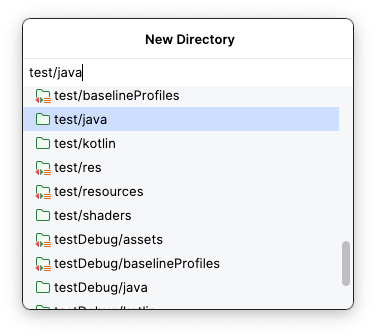
Press Enter. The
testdirectory can now be seen in the Project tab.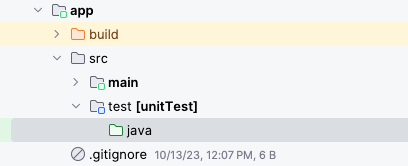
The
testdirectory requires a package structure identical to that of themaindirectory where your app code lives. In other words, just as your app code is written in themain/java/com/example/tiptimepackage, your local tests will be written intest/java/com/example/tiptime.Create this package structure in the test directory. Right click on the
test/javadirectory and select New ➜ Package.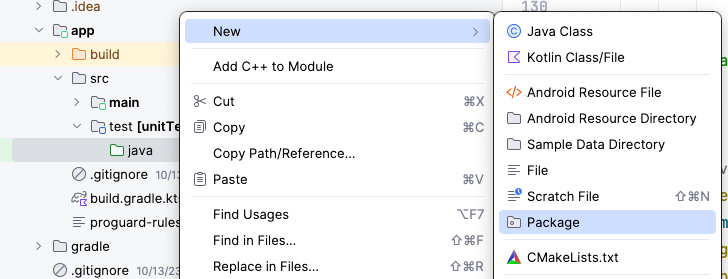
In the New Package window, type
com.example.tiptime.
Create the test class: local test
Now that the test package is ready, it’s time to write some tests! Start by creating the test class.
In the Project tab, click app > src > test and then click the > expander arrow next to the test directory.
Right click the com.example.tiptime directory and then select New ➜ Kotlin Class/File.
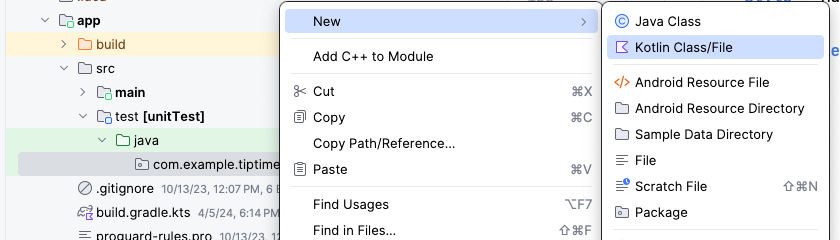
Enter
TipCalculatorTestsas the class name.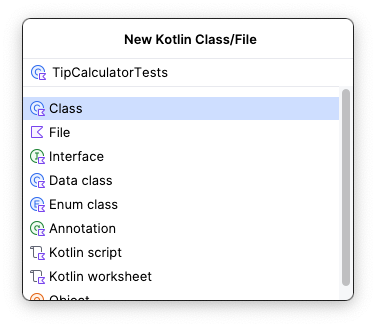
Write the local test
As previously mentioned, local tests are used to test small pieces of code in the app. The main function of the Tip Time App calculates tips, so there should be a local test that ensures that the tip calculation logic works correctly.
To achieve this, you need to directly call the
calculateTip()function like you did in the app code. Then you ensure that the value returned by the function matches an expected value based on the values that you passed to the function.There are a few things that you should know about writing automated tests. The following list of concepts apply to local and instrumentation tests. They might seem abstract at first, but you become more familiar with them by the end of this codelab.
Write automated tests in the form of methods.
Annotate the method with the
@Testannotation. This lets the compiler know that the method is a test method and runs the method accordingly.
Note
The
@Testannotation is imported from theorg.junit.Testpackage usingimport org.junit.Test.Ensure that the name clearly describes what the test tests for and what the expected result is.
Test methods don’t use logic like regular app methods. They aren’t concerned with how something is implemented. They strictly check an expected output for a given input. That is to say, test methods only execute a set of instructions to assert that an app’s UI or logic functions correctly. You don’t need to understand what this means yet because you see what this looks like later, but remember that test code may look quite different from the app code that you’re used to.
Tests typically end with an assertion, which is used to ensure that a given condition is met. Assertions come in the form of a method call that has
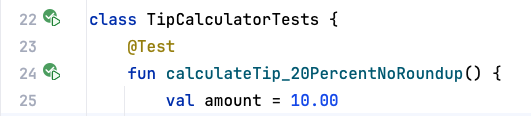
assertin its name. For example: theassertTrue()assertion is commonly used in Android testing. Assertion statements are used in most tests, but they’re rarely used in actual app code.Create a method to test the calculation of a 20% tip for a $10 bill amount. The expected result of that calculation is $2.
import org.junit.Test

class TipCalculatorTests {

  @Test
  fun calculateTip_20PercentNoRoundup() {

  }
}
You may remember that the
calculateTip()method from theMainActivity.ktfile in the app code requires three parameters. The bill amount, the tip percent, and a flag to round the result or not.fun calculateTip(amount: Double, tipPercent: Double, roundUp: Boolean)
When it comes time to call this method from the test, these parameters need to be passed like they were when the method was called in the app code.
In the
calculateTip_20PercentNoRoundup()method, create two constant variables: an amount variable set to a 10.00 value and a tipPercent variable set to a 20.00 value.val amount = 10.00 val tipPercent = 20.00
In the
MainActivity.ktfile, observe the following code, the tip amount is formatted based on the locale of the device.... NumberFormat.getCurrencyInstance().format(tip) ...
The same formatting must be used when verifying the expected tip amount in the test.
Create an
expectedTipvariable set toNumberFormat.getCurrencyInstance().format(2).The
expectedTipvariable is compared to the result of thecalculateTip()method later. This is how the test ensures that the method works correctly. In the last step, you set theamountvariable to10.00, andtipPercentto20.00. Twenty percent of 10 is 2, henceexpectedTipwill be set to a formatted currency with a value of 2. Remember, thecalculateTip()method returns a formattedStringvalue.Call the
calculateTip()method with theamountandtipPercentvariables, and pass afalseargument for the roundup.You don’t need to account for rounding up in this case because the expected result doesn’t factor in rounding up.
Store the result of the method call in a constant
actualTipvariable.Up to this point, writing this test hasn’t been much different from writing a regular method in the app code. However, now that you have the returned value from the method that you want to test, you must determine whether that value is the correct value with an assertion.
Making an assertion is typically the end goal of an automated test and it’s not something commonly used in app code. In this case, you want to ensure that the
actualTipvariable is equal to theexpectedTipvariable. TheassertEquals()method from theJUnitlibrary can be used for this.The
assertEquals()method takes two parameters: an expected value and an actual value. If those values are equal, the assertion and the test pass. If they’re not equal, the assertion and the test fail.Call this
assertEquals()method, and then pass in theexpectedTipandactualTipvariables as parameters:import org.junit.Assert.assertEquals import org.junit.Test import java.text.NumberFormat class TipCalculatorTests { @Test fun calculateTip_20PercentNoRoundup() { val amount = 10.00 val tipPercent = 20.00 val expectedTip = NumberFormat.getCurrencyInstance().format(2) val actualTip = calculateTip(amount = amount, tipPercent = tipPercent, false) assertEquals(expectedTip, actualTip) } }
Note
There are many assertions in the
JUnitlibrary. Some common assertions that you might encounter are:assertEquals() assertNotEquals() assertTrue() assertFalse() assertNull() assertNotNull() assertThat()
For more information, see Assert.
Run the local test
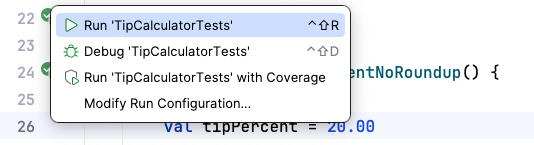
Now it’s time to run your test! You may have noticed that arrows appear in the gutter alongside the line number of your class name and test function. You can click these arrows to run the test. When you click the arrow next to a method, you only run that test method. If you have multiple test methods in a class, you can click the arrow next to the class to run all the test methods in that class.
Click the arrows next to the class declaration and then click Run ‘TipCalculatorTests’.
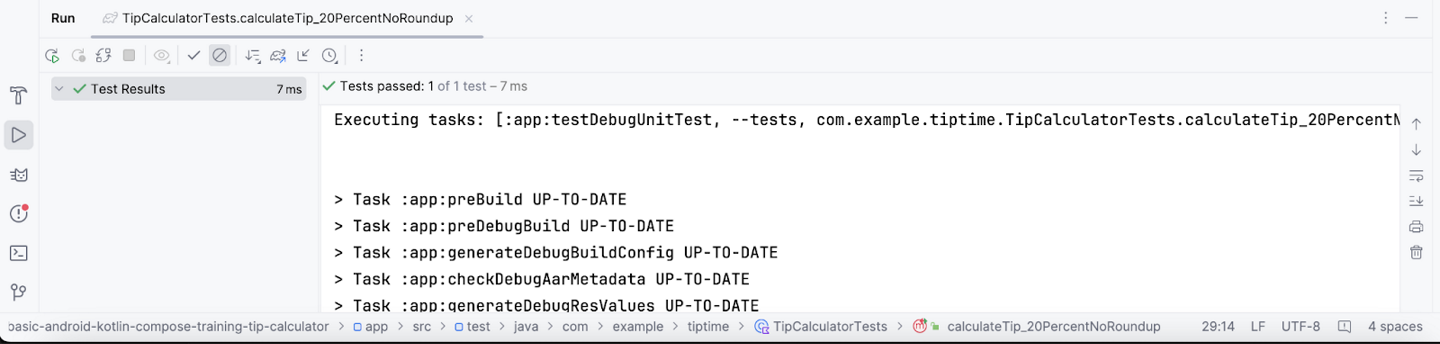
At the bottom of the Run pane, you see some output.
Write an instrumentation test
Create the instrumentation directory
The instrumentation directory is created in a similar manner to that of the local test directory.
Right click on the
srcdirectory and select New > Directory.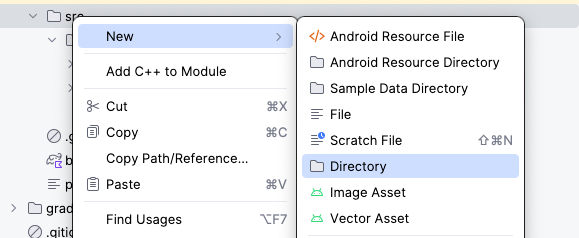
In the New Directory window select
androidTest/java.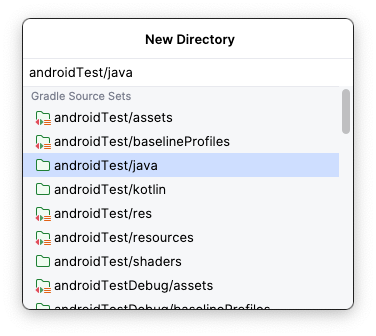
Press Enter. The
androidTestdirectory can now be seen in the Project tab.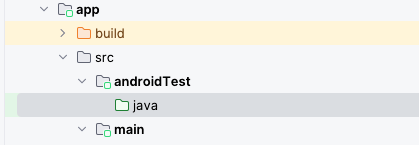
Just like the
mainandtestdirectories have the same package structure, theandroidTestdirectory must also contain that same package structure.Right click on the
androidTest/javafolder and select New > Package.In the
New Packagewindow, typecom.example.tiptime.Press Enter. The complete package structure for the
androidTestdirectory can now be seen in the Project tab.
Create the test class: instrumentation test
In Android projects, the instrumentation test directory is designated as the
androidTestdirectory.To create an instrumentation test, you need to repeat the same process that you used to create a local test, but this time create it inside the
androidTestdirectory.Navigate to the androidTest directory in the project pane.
Click the > expand arrows next to each directory until you see the
com.example.tiptimedirectory.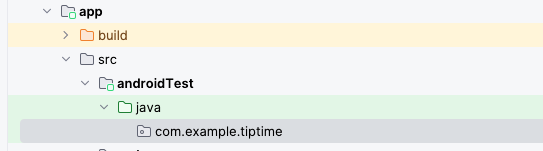
Right-click the
tiptimedirectory and then select New > Kotlin Class/File. EnterTipUITestsas the class name.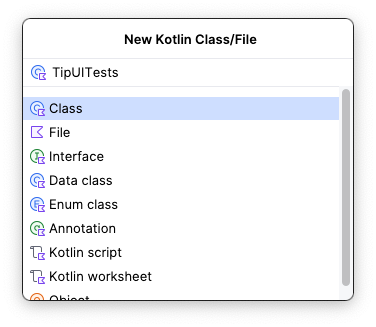
Write the instrumentation test
Instrumentation test code is quite different from local test code.
Instrumentation tests test an actual instance of the app and its UI, so the UI content must be set, similar to how the content is set in the
onCreate()method of theMainActivity.ktfile when you wrote the code for the Tip Time app. You need to do this before you write all instrumentation tests for apps built with Compose.In the case of the Tip Time app tests, you proceed to write instructions to interact with the UI components so that the tip calculating process is tested through the UI. The concept of an instrumentation test can seem abstract at first. The process is covered in the following steps.
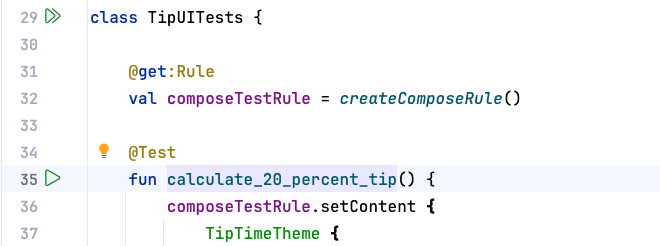
Create a
val composeTestRule = createComposeRule()and annotate it with@get:Rule:import androidx.compose.ui.test.junit4.createComposeRule import org.junit.Rule class TipUITests { @get:Rule val composeTestRule = createComposeRule() }
Create a
calculate_20_percent_tip()method and annotate it with the@Testannotation:import org.junit.Test @Test fun calculate_20_percent_tip() { }
The compiler knows that methods annotated with
@Testannotation in theandroidTestdirectory refer to instrumentation tests and methods annotated with@Testannotation in thetestdirectory refer to local tests.In the function body, call the
composeTestRule.setContent()function. This sets the UI content of thecomposeTestRule.In the function’s lambda body, call the
TipTimeTheme()function with a lambda body that calls theTipTimeLayout()function.import com.example.tiptime.ui.theme.TipTimeTheme @Test fun calculate_20_percent_tip() { composeTestRule.setContent { TipTimeTheme { TipTimeLayout() } } }
When you’re done, the code should look similar to:
package com.example.tiptime

import androidx.compose.ui.test.junit4.createComposeRule
import com.example.tiptime.ui.theme.TipTimeTheme
import org.junit.Rule
import org.junit.Test

class TipUITests {

    @get:Rule
    val composeTestRule = createComposeRule()

    @Test
    fun calculate_20_percent_tip() {
        composeTestRule.setContent {
            TipTimeTheme {
                TipTimeLayout()
            }
        }
    }
}
Now that the UI content is set up, you can write instructions to interact with the app’s UI components. In this app, you need to test that the app displays the correct tip value based on the bill amount and tip percentage inputs.
UI components can be accessed as nodes through the composeTestRule. A common way to do this is to access a node that contains a particular text with the
onNodeWithText()method. Use theonNodeWithText()method to access the TextField composable for the bill amount:import androidx.compose.ui.test.onNodeWithText @Test fun calculate_20_percent_tip() { composeTestRule.setContent { TipTimeTheme { TipTimeLayout() } } composeTestRule.onNodeWithText("Bill Amount") }
Next you can call the
performTextInput()method and pass in the text that you want entered to fill theTextFieldcomposable.Populate the
TextFieldfor the bill amount with a10:import androidx.compose.ui.test.performTextInput @Test fun calculate_20_percent_tip() { composeTestRule.setContent { TipTimeTheme { TipTimeLayout() } } composeTestRule.onNodeWithText("Bill Amount").performTextInput("10") }
Use the same approach to populate the
OutlinedTextFieldfor the tip percentage with a20value:@Test fun calculate_20_percent_tip() { composeTestRule.setContent { TipTimeTheme { TipTimeLayout() } } composeTestRule.onNodeWithText("Bill Amount").performTextInput("10") composeTestRule.onNodeWithText("Tip Percentage").performTextInput("20") }
After all the
TextFieldcomposables are populated, the tip displays in a Text composable at the bottom of the screen in the app.Now that you instructed the test to populate these
TextFieldcomposables, you have to make sure that theTextcomposable displays the correct tip with an assertion.In instrumentation tests with Compose, assertions can be called directly on UI components. There are a number of assertions available, but in this case you want to use the
assertExists()method. TheTextcomposable that displays the tip amount is expected to display: Tip Amount: $2.00.Note
The currency symbol may change depending on device locale. The usage of
$is just an example. The currency must be formatted based on locale.Make an assertion that a node with that text exists:
import java.text.NumberFormat

@Test
fun calculate_20_percent_tip() {
    composeTestRule.setContent {
        TipTimeTheme {
            Surface (modifier = Modifier.fillMaxSize()){
                TipTimeLayout()
            }
        }
    }
  composeTestRule.onNodeWithText("Bill Amount")
      .performTextInput("10")
  composeTestRule.onNodeWithText("Tip Percentage").performTextInput("20")
  val expectedTip = NumberFormat.getCurrencyInstance().format(2)
  composeTestRule.onNodeWithText("Tip Amount: $expectedTip").assertExists(
      "No node with this text was found."
  )
}
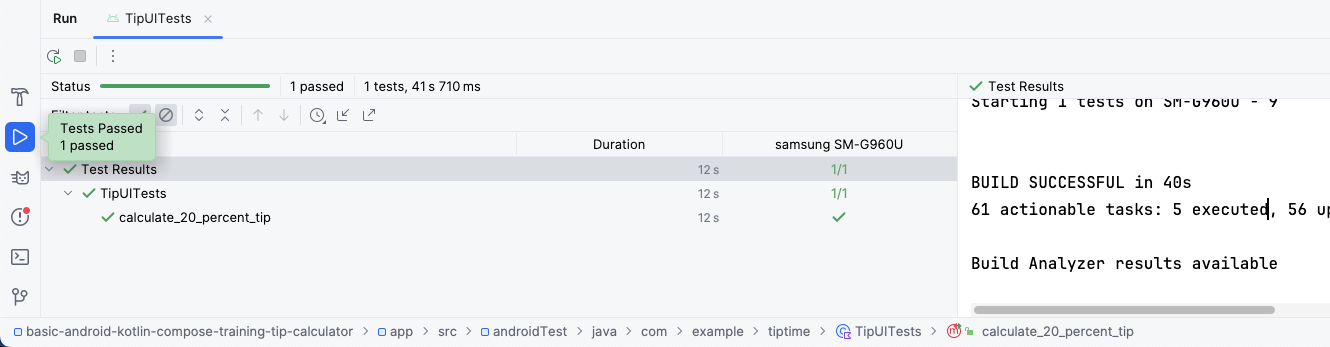
Run the instrumentation test
The process of running an instrumentation test is the same as that for a local test. You click the arrows in the gutter next to each declaration to run an individual test or the entire test class.
Click the arrows next to the class declaration. You can see the tests run on your device or emulator. When the test is finished, you should see:
Solution code
Branch: test_solution
Clone:
$ git clone https://github.com/google-developer-training/basic-android-kotlin-compose-training-tip-calculator.git
$ cd basic-android-kotlin-compose-training-tip-calculator
$ git checkout test_solution
Conclusion
Congratulations! You wrote your first automated tests in Android. Tests are a critical component of software quality control. As you continue to build Android apps, ensure that you write tests alongside your app features to ensure that your apps work properly throughout the development process.
What automated tests are.
Why automated tests are important.
The difference between local tests and instrumentation tests
Fundamental best practices for writing automated tests.
Where to find and place local and instrumentation test classes in an Android project.
How to create a test method.
How to create local and instrumentation test classes.
How to make assertions in local and instrumentation tests.
How to use test rules.
How to use ComposeTestRule to launch the app with a test.
How to interact with composables in an instrumentation test.
How to run tests.